
Pruning
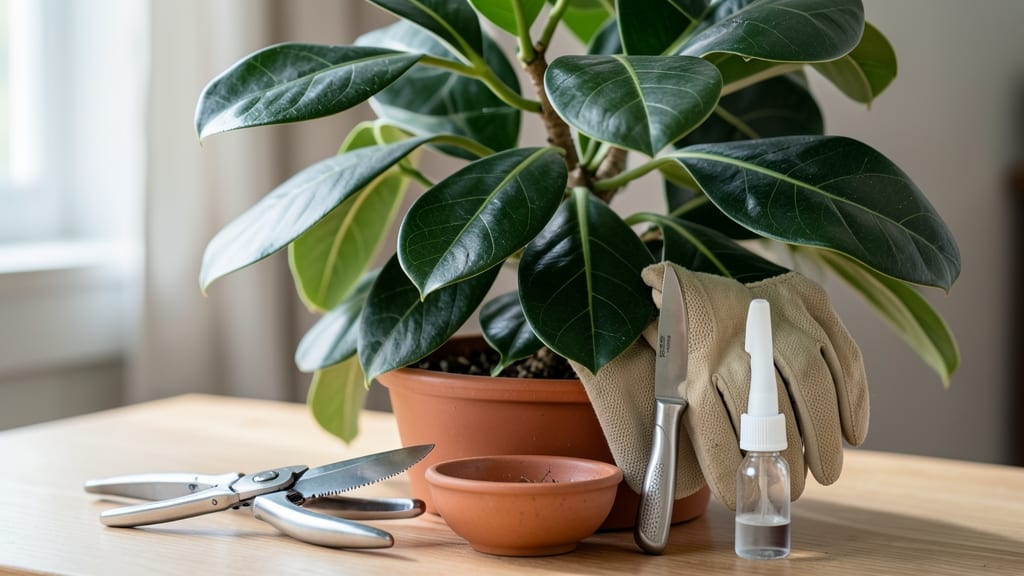
Pruning indoor plants isn't just about making them look neat—it's the secret to keeping them thriving year after year. 🌿 I've learned the hard way that skipping this step leads to leggy, sparse growth, but with the right technique, you'll encourage fuller, healthier plants that bloom and flourish.
The key is knowing when and how to trim, and which parts to focus on for each type of plant.
You only need a few simple tools: clean, sharp scissors or pruning shears, rubbing alcohol for sterilizing, and a small container for clippings. Timing matters too—spring and summer are ideal for most plants, while winter pruning should be minimal.
Start with the basics: remove yellow or dead leaves, trim overgrown stems just above a leaf node, and pinch back leggy growth to encourage branching.
For popular plants like pothos or snake plants, pruning promotes bushier growth and prevents them from becoming top-heavy. Fiddle-leaf figs respond well to strategic cuts to shape their canopy.
The result? Plants that stay compact, vibrant, and productive—plus, you get free cuttings to propagate new plants. It's a win-win for your green space.
Even experienced plant parents make mistakes, like over-trimming or using dirty tools. The good news? Pruning is forgiving once you understand the basics. Start small, observe how your plants respond, and soon you'll be trimming like a pro—keeping your indoor jungle lush and full of life.
📚 In This Guide
- What you need
- Instructions
- Tips and common mistakes
- Wrapping up and next steps
What you need
- ● Clean, sharp pruning shears: A pair of bypass pruners (for small stems) or anvil pruners (for thicker branches). Sterilize with rubbing alcohol before and after use.
- ● Hand pruners or scissors: For delicate plants like pothos or string of pearls. Choose small, sharp blades (1-2 inches) to avoid crushing stems.
- ● Rubbing alcohol (70% or higher): 1 small bottle (4 oz) to disinfect tools and prevent disease spread.
- ○ Gloves (optional but recommended): Nitrile or cotton gloves to protect hands from sap (e.g., poinsettia or rubber plants) or thorns (cacti).
- ● Newspaper or drop cloth: 1-2 sheets to catch debris and protect surfaces.
- ● Small container or bag: For collecting cuttings (e.g., plastic bag or glass jar with water for propagation).
- ○ Horticultural oil or beeswax: Small jar (optional) to seal larger cuts and prevent sap oozing (great for monstera or ficus).
- ● Research your plant: Know if it’s evergreen (e.g., snake plant) or deciduous (e.g., peace lily), and check its growth habits.
- ● Choose the right time: Prune during active growth phases (spring/summer for most plants; avoid dormant seasons).
- ● Water lightly 24 hours prior: Slightly moist (not soggy) soil reduces stress during pruning.
- ● Clear workspace: Move the plant to a well-lit, uncluttered area with good airflow.
Step-by-step guide to pruning indoor plants
Revitalize your houseplants with these simple, science-backed pruning techniques.
✂️ Step 1: Identify What to Prune
Start by examining your plant for dead, yellowed, or brown leaves—these are your first targets. I always work from the bottom up, removing anything that looks limp or discolored first. Healthy leaves should be firm, vibrant, and free of spots. If you spot leggy growth (long, sparse stems with few leaves), those stems need trimming too.
Look for overcrowded areas where branches rub against each other—this creates wounds where pests or diseases can enter. Prune these back to just above a leaf node (the small bump where leaves grow) to encourage new growth. This is where your plant will send out fresh shoots, so you're not just cleaning up—you're shaping its future.
✂️ Step 2: Gather the Right Tools
Use clean, sharp pruning shears for larger stems and sterilized scissors for smaller leaves. I like to wipe my tools with rubbing alcohol before and after pruning to prevent spreading bacteria. Never use dull scissors—they tear plant tissue instead of making clean cuts, which slows healing.
Grab a small container to collect clippings. You can propagate many indoor plants from these cuttings (like pothos or snake plants), so don’t toss them! Just place them in water or soil to root. If you’re dealing with dusty plants, have a damp cloth handy to wipe leaves clean afterward—this helps them absorb light more efficiently.
✂️ Step 3: Make Clean Cuts at the Right Spots
For leafy stems, cut just above a leaf node (the bump where leaves attach) at a 45-degree angle. This prevents water from pooling on the cut, which can rot the stem. If you’re trimming a leggy stem, cut it back to a lower node to encourage bushier growth. You’ll see new leaves sprouting from that node within a few weeks.
For thick stems (like on a money tree or rubber plant), make your cut ¼ inch above a node and just below a leaf. Avoid leaving stubs—this invites disease. If you’re unsure where the node is, count leaves upward from the base and cut between the 3rd and 4th leaf from the bottom for most plants. This balance keeps the plant compact but encourages upward growth.
🌿 Step 4: Encourage New Growth After Pruning
After trimming, move your plant to a bright, indirect light spot for 1-2 weeks. This gives it time to recover without stress from direct sun. You’ll notice new growth within 2-4 weeks—look for small bumps at the nodes where you cut. These are your plant’s way of saying, “Thanks for the trim!”
Water lightly after pruning, but don’t overdo it. The cuts are open wounds, and too much water can cause rot. Let the top 1 inch of soil dry out before watering again. If your plant drops leaves after pruning, don’t panic—it’s just adjusting. Keep the environment humid (a pebble tray with water helps) to ease the transition.
⏰ Step 5: Maintain a Pruning Schedule
Prune most indoor plants every 3-6 months, depending on growth speed. Fast growers (like spider plants or pothos) need trimming more often, while slower growers (like snake plants) can wait. I set reminders on my phone to check plants in spring and fall—these are the best times for major pruning since they align with natural growth cycles.
Watch for new growth patterns after each trim. If your plant keeps growing leggy, it needs more light. If it grows too bushy, prune back by ⅓ of its height to open up the center. This isn’t just about looks—it’s about airflow and light penetration, which keeps your plant healthy year-round.
Tips & tricks for perfect indoor plant pruning
Here's what nobody tells you about giving your plants the best trim of their lives.
Tool Prep is Everything: Sterilizing your tools isn't just about hygiene—it's about your plant's survival. I've seen pruning shears spread fungus between plants when I skipped this step. Wipe blades with rubbing alcohol between cuts, especially when moving from plant to plant. For stubborn sap (like on rubber plants), use a tiny bit of dish soap on a cloth to clean sticky residue without damaging the plant.
Node Location Secret: That ¼-inch mark above the node in Step 3 isn't arbitrary—it's where the magic happens. If you cut too close, you leave a stub that collects moisture and rots. Too far, and you remove the growth point. For thick stems, I like to make a tiny mark with a pencil first to visualize where that ¼-inch measurement should land before cutting.
Light Recovery Strategy: After pruning, the 1-2 weeks in bright indirect light are crucial, but don't just shove your plant near a window. East-facing windows provide perfect morning light without harsh afternoon sun. If you notice leaves curling toward the light, rotate the plant quarter-turn daily so all sides grow evenly. This prevents that lopsided look we all hate.
Propagate Like a Pro: Those clippings you collect aren't just waste—they're free plants! For leafy stems like pothos, place the cuttings in water with just the node submerged. For thick stems, bury the node in moist soil instead. I keep a small propagation station with clear cups so I can watch roots grow—it's oddly satisfying and gives you instant gratification from your pruning efforts.
Pro Tips for Prune Indoor Plants
- Here's what nobody tells you about giving your plants the best trim of their lives.
- Tool Prep is Everything: Sterilizing your tools isn't just about hygiene—it's about your plant's survival. I've seen ...
- Node Location Secret: That ¼-inch mark above the node in Step 3 isn't arbitrary—it's where the magic happens. If you ...
Frequently asked questions
Got questions about pruning your indoor plants? You’re not alone! Here are some of the most common concerns—plus clear, actionable answers to keep your greenery thriving.
How often should I prune my indoor plants?
Most indoor plants benefit from pruning every 6–12 months, but it depends on growth speed. Fast growers (like pothos or spider plants) may need trims every 3–6 months, while slower ones (like snake plants) can wait a year. Always prune when you spot overcrowding, leggy stems, or yellowing leaves—these are signs your plant is ready!
Can I prune my indoor plant at any time of year?
While indoor plants aren’t as seasonal as outdoor ones, spring and early summer are ideal for pruning because they encourage new growth. Avoid heavy pruning in winter when plants are dormant. If you must trim outside these windows, just remove dead or damaged leaves anytime—your plant will thank you!
What do I do with the cuttings after pruning?
Don’t toss those trimmings! Many plants (like succulents, pothos, or philodendrons) can root in water—just place cuttings in a jar with fresh water and wait 2–4 weeks for roots to form. For others, try soil propagation: dip cuttings in rooting hormone (optional) and plant in moist soil. Pro tip: Label your cuttings so you remember what they are!
My plant is bleeding sap after pruning—is that normal?
Some plants (like monstera, ficus, or rubber plants) ooze a milky sap when cut—that’s totally normal! Just wipe the sap with a damp cloth and let the cut dry for a few hours before repotting or discarding. If the sap is dark, smelly, or excessive, it might signal stress or disease. In that case, trim the affected area and monitor closely.
How do I know if I’m over-pruning my plant?
Over-pruning shows up as stunted growth, bare stems, or excessive leaf drop. If your plant looks shocked (like it’s shedding more than usual) or stops producing new leaves, you’ve likely gone too far. Rule of thumb: Never remove more than 1/3 of the plant’s foliage in one session. When in doubt, prune less—you can always trim more later!
Wrapping up and next steps
Pruning your indoor plants doesn’t have to be intimidating—it’s all about confidence and consistency! 🌿 By following the right techniques, you’ll encourage lush growth, prevent pests, and keep your green friends thriving year-round. Start small, observe your plants, and soon you’ll be a pruning pro.
Ready to take the next step? Pick one plant this week, grab your tools, and give it a trim! Your indoor jungle will thank you with vibrant, healthy foliage in no time.