
Propagation
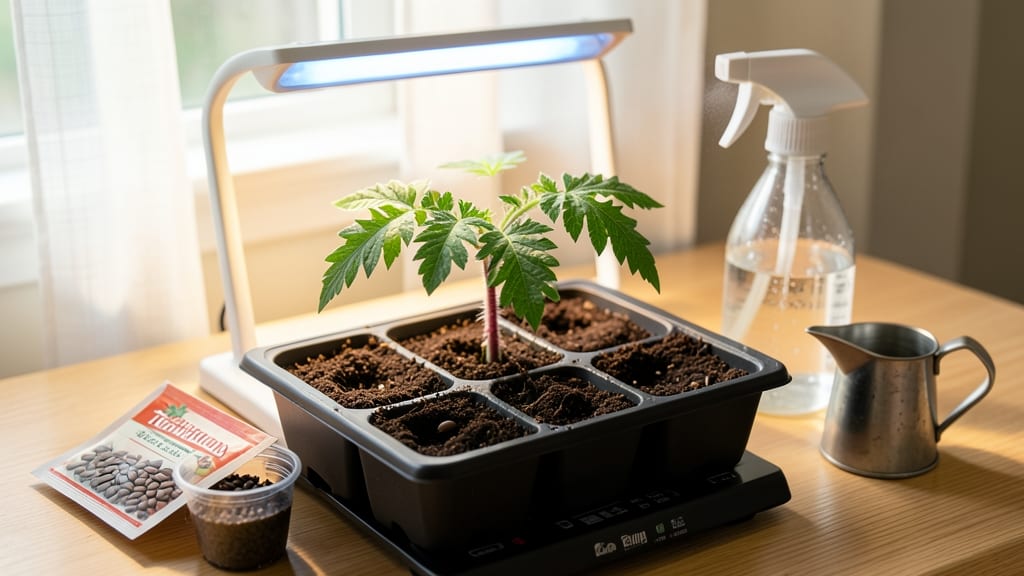
Growing tomatoes from seeds indoors means bursting seedlings ready for transplant by spring—no nursery price tags or limited varieties. 🌱 I’ve turned my kitchen windowsill into a seed-starting station that produces stocky, disease-resistant plants every year, and I’ll show you how to do the same without fancy equipment.
The secret lies in light, warmth, and patience—not expensive setups. You’ll need basic supplies like seed-starting mix, small pots, and a grow light (or sunny window), plus a spray bottle to keep seeds moist without drowning them.
Most seedlings appear in 5-10 days, and with the right care, they’ll outpace store-bought transplants by weeks. By the time you’re ready to move them outside, your seedlings will be thriving with 4-6 true leaves, ready to handle real garden conditions.
No more floppy, weak plants—just strong stems and vibrant green that translate to bigger harvests later. This method works for any tomato variety, from beefsteaks to cherry tomatoes, and adapts to small spaces. Let’s get those seeds sprouting!
📚 In This Guide
- What you need
- Instructions
- Tips and common mistakes
- Wrapping up and next steps
What you need
- ● Tomato seeds: Choose heirloom or hybrid varieties based on your preference (e.g., cherry, beefsteak, or Roma). Start with 3–5 seeds per pot to increase germination success.
- ● Seed-starting trays or small pots: Use 2–4 inch pots or a seed tray with individual cells (biodegradable options are eco-friendly!).
- ● Seed-starting mix: A lightweight, sterile potting mix (avoid garden soil—it’s too dense!). Look for a blend labeled "seed-starting" or "organic potting mix."
- ● Grow lights or a sunny windowsill: Seedlings need 12–16 hours of light daily. A full-spectrum LED grow light (10–12 inches above seedlings) works best if natural light is limited.
- ● Plastic domes or plastic wrap: Creates a humid microclimate to encourage germination (remove once sprouts emerge).
- ● Spray bottle with water: Keeps the soil consistently moist without oversaturating it.
- ○ Heat mat (optional but helpful): Maintains soil temps at 75–85°F for faster germination (especially useful in cooler climates).
- ● Fertilizer (balanced or seed-starting formula): Use a diluted liquid fertilizer (5-10-5 or 10-10-10) once seedlings develop their first true leaves.
- ● Seedling heaters or bottom watering trays: Automates moisture control and warmth.
- ● pH testing kit: Ensures your soil is in the ideal range (6.0–6.8) for tomato seeds.
- ● Labeling tags or markers: Keeps track of seed varieties if growing multiple types.
- ● Fungicide (like neem oil or hydrogen peroxide): Prevents damping-off disease in humid conditions.
- ● Pruning shears or scissors: For transplanting or trimming later stages.
Step-by-step instructions for growing tomatoes indoors from seed
Here's my battle-tested method to get strong, healthy tomato seedlings ready for transplanting.
🌱 Step 1: Prepare Containers and Seed Starting Mix
Fill clean 2-3 inch deep containers with a sterile seed-starting mix—never garden soil. I like biodegradable peat pots because they eliminate transplant shock later. Moisten the mix until it holds together when squeezed but doesn't drip. Press it down lightly so the surface is firm but not compacted. Tap the container gently to settle everything evenly.
Tomato seeds need excellent drainage. If your containers don't have drainage holes, poke a few with a pencil. I always label each pot with the variety and date—after a week, identical green sprouts will look exactly the same if you don't!
🌱 Step 2: Sow Seeds at the Correct Depth
Plant 1-2 seeds per cell at a depth of about ¼ inch—roughly the diameter of the seed. Sowing too deep delays germination because the seedling exhausts its energy before reaching light. Cover lightly with a sprinkle of additional mix. Mist the surface until evenly moist, but don't soak it. Heavy watering can dislodge seeds and bury them too deep.
I tap the seed packet gently to release one seed at a time—planting too many in one hole leads to weak, crowded seedlings. Space containers on a seedling heat mat set to 75-85°F for fastest germination. Expect sprouts in 5-10 days, though some varieties take longer.
💧 Step 3: Provide Warmth and Controlled Moisture
Cover the trays with a clear humidity dome or plastic wrap to retain warmth and moisture. The dome creates a mini greenhouse effect that speeds germination. Check daily but resist watering—condensation inside the dome should keep the soil evenly damp. Once 50% of seeds have sprouted, remove the dome immediately to prevent damping-off disease.
I know it seems weird, but don't water from above once seedlings emerge. You'll know moisture is right when the soil surface looks slightly damp but not glistening. Overwatering now causes stems to rot before they even get a chance to grow.
☀️ Step 4: Move to Bright, Direct Light Immediately
The instant seedlings break through the soil, they need 14-16 hours of light daily. A south-facing window rarely provides enough intensity, so I use a full-spectrum LED grow light positioned 2-4 inches above the plants. Raise it as they grow to maintain that gap. Without sufficient light, seedlings stretch desperately upward (called "leggy") and never recover proper strength.
Strong seedlings have thick stems, deep green color, and compact spacing between leaves. You'll see leggy growth as thin, pale stems with leaves spaced far apart. If this happens, move the light closer immediately—within 4 inches of the plants.
⏰ Step 5: Harden Off Before Transplanting Outdoors
Two weeks before your last frost date, start hardening off the seedlings by placing them outside in a sheltered, shaded spot for 1-2 hours the first day. Gradually increase outdoor time by 1 hour daily over 10-14 days, slowly introducing more sun and wind. This prepares them for the garden without shock.
Skipping this step burns leaves, breaks stems, and shocks plants severely. Once seedlings tolerate a full day outside without wilting, they're ready for the garden. Transplant on an overcast afternoon to reduce transplant shock and water deeply at the base to settle the soil around the roots.
Tips & tricks for perfect indoor tomato seedlings
Real talk: I've lost count of the seedlings I've sacrificed to trial and error, but these tricks will save you from the same mistakes. The difference between thriving plants and sad, leggy failures often comes down to these simple adjustments.
Germination Speed: For faster sprouts, soak your tomato seeds in warm water for 4-6 hours before planting. This hydrates them fully so they burst through the soil in just 3-5 days instead of the usual 5-10 days. Just be sure to plant them immediately after soaking—they won't keep well. I use a small bowl of warm water and a mesh bag to contain them during soaking.
Light Positioning: In Step 4, when you're setting up your grow light, position it so the seedlings' tops just brush the bottom of the light fixture. This ensures even light distribution without burning delicate leaves. I raise the light 1 inch every 5-7 days as the plants grow, keeping that same just-touching-the-light rule. The 2-4 inch range is a good starting point, but don't be afraid to adjust as your seedlings grow.
Disease Prevention: After removing the humidity dome when 50% of seeds have sprouted, I immediately switch to bottom-watering—placing the containers in a shallow tray of water for 10-15 minutes instead of watering from above. This prevents fungal diseases that thrive in damp foliage. Add a sprinkle of cinnamon to the soil surface after watering; it's a natural antifungal that won't harm your plants.
Transplanting Hack: When it's time to transplant outdoors, I make small slits in the biodegradable peat pots before planting to encourage root expansion. This gives your seedlings a head start in their new home. I also water the pots thoroughly 24 hours before transplanting—this helps prevent transplant shock by keeping the roots hydrated during the move.
Pro Tips for Grow Tomatoes From Seeds Indoors
- Real talk: I've lost count of the seedlings I've sacrificed to trial and error, but these tricks will save you from t...
- Germination Speed: For faster sprouts, soak your tomato seeds in warm water for 4-6 hours before planting. This hydra...
- Light Positioning: In Step 4, when you're setting up your grow light, position it so the seedlings' tops just brush t...
Frequently asked questions
Got questions about growing tomatoes from seeds indoors? You’re not alone! Here are answers to the most common queries to help you navigate your seed-sprouting journey with confidence.
How long does it take for tomato seeds to germinate indoors?
Most tomato seeds sprout within 5 to 14 days when kept in warm, moist conditions (70–85°F). Heating mats or a sunny windowsill can speed this up. If no sprouts appear after 2 weeks, gently check for mold or rot—discard any suspicious trays and replant fresh seeds.
Can I grow tomatoes indoors year-round, or do they need seasonal breaks?
Yes, you can grow tomatoes indoors year-round with proper lighting (14–16 hours of grow lights) and temperature control. However, they thrive best with a "rest" period in winter if you’re in a cooler climate. Prune aggressively and reduce watering to mimic dormancy, then restart growth in spring.
What if my seedlings look leggy or weak? How do I fix it?
Leggy seedlings mean they’re stretching for light. Move them closer to a bright window or grow light (within 2–3 inches) and rotate trays daily for even growth. Avoid overcrowding—thin seedlings to 1–2 inches apart. For extra support, use a seedling jack or small stakes early on.
Do I need to harden off tomato seedlings before transplanting outdoors?
Harden off seedlings 1–2 weeks before transplanting by gradually exposing them to outdoor conditions. Start with 1–2 hours of shade, then increase time and sun exposure daily. Skip this step, and seedlings may shock or wilt when moved outside.
What’s the best alternative if I don’t have grow lights?
Use a south-facing window (6+ hours of sunlight) or a reflective surface (like aluminum foil) to bounce light onto seedlings. If natural light is limited, a DIY grow light (LED shop lights or even a bright LED bulb) works in a pinch—just keep it 6 inches above seedlings for 12–14 hours daily.
Still stumped? Drop your question in the comments—we’re happy to help troubleshoot your tomato-growing adventure!
Wrapping up and next steps
Growing tomatoes from seeds indoors is a rewarding journey that starts with patience, a little warmth, and the right tools. By following these speed-sprouting secrets, you’ll watch tiny seeds transform into thriving seedlings ready for transplanting—all while saving money and enjoying the satisfaction of homegrown produce. 🌱
Now that you’re armed with the knowledge, it’s time to roll up your sleeves and get sprouting!
Start with a handful of seeds, create your mini greenhouse, and soon you’ll be harvesting juicy, homegrown tomatoes. Next up? Share your progress with fellow gardeners or explore advanced tips like pruning and pest control to keep your plants flourishing. Happy growing! 🍅✨