
Container Gardens
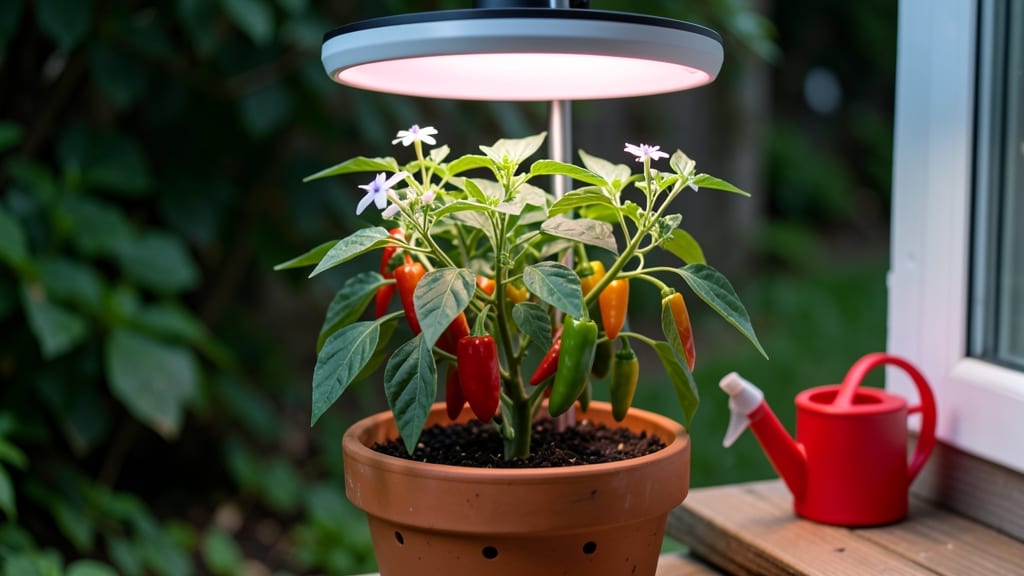
Growing chili peppers indoors lets you harvest fiery heat all year—no backyard needed. 🌱 My first batch of jalapeños thrived on a sunny windowsill, proving you don’t need acres, just the right setup.
The key is replicating their tropical home: bright light, warm temps, and consistent care. I’ll show you how to turn a small space into a pepper powerhouse, even with limited sunlight.
Start with a 5-gallon container and well-draining potting mix—peppers hate soggy roots. A grow light (or south-facing window) gives them 12-16 hours of light daily, and a small fan keeps humidity in check.
Most beginners overwater, so let the top inch dry before watering again. The first harvest? 8-12 weeks from seed, with plants that keep producing for months.
Watch for leggy stems (a sign of weak light) and spider mites (common indoors). Prune side shoots early to focus energy on fruit, and pinch off early blooms if your plant looks stressed.
By summer, you’ll be swapping store-bought peppers for homegrown jalapeños, habaneros, or even ghost peppers—all grown in a corner of your kitchen.
This works for apartments, offices, or sunless basements. The only limit is your heat tolerance—and your creativity with spicy dishes. Let’s get those seeds started!
📚 In This Guide
- What you need
- Instructions
- Tips and common mistakes
- Wrapping up and next steps
What you need
- ● Chili pepper seeds or seedlings: 2–5 plants (depending on variety and space). Pro tip: 🌶️ Choose compact varieties like Jalapeño, Thai Chili, or Shishito for indoor growing!
- ○ Containers: 5–10 inch pots (one per plant) with drainage holes. Optional: Self-watering pots or fabric grow bags for convenience.
- ● High-quality potting mix: 1–2 bags (sterile, well-draining mix with perlite or vermiculite). Avoid garden soil!
- ● Grow lights: 1–2 full-spectrum LED lights (12–16 hours/day) or a south-facing window with bright, direct sunlight (6+ hours/day).
- ● Fertilizer: Balanced liquid fertilizer (10-10-10 or 5-5-5) or organic options like fish emulsion or compost tea.
- ● Spray bottle: For gentle watering and humidity control.
- ○ Humidity tray or pebble tray: Optional but helpful for maintaining 40–60% humidity.
- ● Pruning shears or scissors: For trimming and harvesting.
- ○ Support (optional): Small stakes or cages for taller varieties like Habanero or Cayenne.
- ● A warm spot (70–85°F) with consistent temperatures.
- ● Access to clean water (room temperature).
- ● Patience! Chili peppers take 60–90 days to mature indoors.
Step-by-step instructions for growing chili peppers indoors
Here's how to coax fiery peppers from seeds into productive plants with just a sunny window and steady care.
🌱 Step 1: Start Seeds in Warmth and Moisture
Fill small seedling trays with sterile seed-starting mix and moisten it until damp but not soggy. Plant seeds ¼ inch deep, spacing them ½ inch apart—chili seeds are tiny, so I use a toothpick to place them precisely. Cover lightly with more mix and mist gently with water until the surface looks uniformly damp.
Chili seeds germinate best at 75-85°F, so place the tray on a seedling heat mat or in a warm spot like on top of the fridge. Keep the soil consistently moist by covering the tray with plastic wrap until sprouts appear—usually in 10-14 days. Watch for the first true leaves (the second set after the initial cotyledons) before transplanting.
☀️ Step 2: Provide Bright Light Immediately
Once seedlings emerge, remove any cover and move them to the brightest window you have. South-facing windows work best, but if your space lacks natural light, supplement with a full-spectrum LED grow light kept 2-4 inches above the plants. Chilies need 12-16 hours of light daily—without enough, they'll stretch leggy and weak.
Rotate the tray quarter-turn daily so plants grow straight instead of leaning toward the light. You'll notice strong seedlings developing dark green leaves and compact spacing between nodes. If leaves yellow or stems grow pale, your light source isn't intense enough—adjust immediately.
🪴 Step 3: Transplant to Individual Pots
When seedlings have 3-4 true leaves (about 6-8 weeks after sowing), transplant them into 5-6 inch pots filled with well-draining potting mix. Handle seedlings by their leaves, not stems, to avoid damage. Bury them just below the cotyledons—the first true leaves should sit above soil level.
Water thoroughly after transplanting, then let the top inch of soil dry between waterings. Overwatering now causes root rot, which kills seedlings quickly. Place pots in a spot with 6+ hours of direct sun daily—chilies are sun-hungry and won't produce without it.
💧 Step 4: Fertilize and Support Growth
After 2-3 weeks in individual pots, begin fertilizing with a balanced liquid fertilizer (10-10-10) diluted to half-strength. Feed every 2-3 weeks during active growth to encourage fruiting. Chilies respond well to a calcium supplement (like crushed eggshells) to prevent blossom-end rot later.
As plants grow, provide support with small cages or stakes. Chilies can get top-heavy with peppers, and stems may snap under weight. Prune suckers (the shoots that form in the leaf axils) to direct energy into fruit production. You'll see buds form in 8-12 weeks—watch for the first flowers, which will develop into peppers.
✂️ Step 5: Harvest and Encourage Continuous Production
Harvest peppers when they reach your preferred size and color—this encourages more flowers and fruit. Use clean scissors to snip stems just above the pepper. Wear gloves if handling hot varieties to avoid skin irritation. Store freshly harvested peppers in a cool, dry place or use them immediately in cooking.
Continue fertilizing lightly through the growing season and prune any dead or yellowing leaves to keep plants healthy. If peppers stop producing, check for underwatering or insufficient light—chilies need both to keep flowering. With steady care, your indoor plants can produce peppers for months.
Tips & tricks for growing chili peppers indoors
Here's what nobody tells you about growing chili peppers indoors—these tricks make all the difference between thriving plants and frustrated failures.
Heat Matters: That 75-85°F range for germination isn't just a suggestion—it's critical. If your home stays cooler, place the seed tray on top of the fridge or use a seedling heat mat. I've seen seeds take 21 days to sprout when kept at 68°F instead of the ideal range. Once sprouted, maintain consistent warmth near the plants' growing area, especially at night when temperatures naturally drop.
Light Strategy: The 12-16 hours of daily light is non-negotiable for strong chili plants. If using grow lights, position them just 2-4 inches above the plants—the closer they are, the more intense the light, but don't let them touch the leaves. I rotate my lights every 3 days to prevent uneven growth, and I always check for yellowing leaves as a sign I need to move the lights closer or increase duration.
Transplant Timing: Those 3-4 true leaves are your signal to transplant, but don't rush it. I wait until the seedlings are sturdy enough to handle the move—usually around week 6-7. When transplanting, make sure the soil level stays consistent with what they were growing in. Burying too deep can cause rot, while planting too shallow exposes roots and stresses the plant.
Fertilizer Wisdom: The 2-3 week feeding schedule is perfect for balanced growth, but here's the secret: always water your plants first before applying fertilizer. This prevents root burn from the concentrated nutrients. I also mix my crushed eggshells directly into the soil at transplant time—this calcium reserve prevents blossom-end rot before it starts, saving me from dealing with that problem later.
Pro Tips for Growing Chili Peppers Indoors
- Here's what nobody tells you about growing chili peppers indoors—these tricks make all the difference between thrivin...
- Heat Matters: That 75-85°F range for germination isn't just a suggestion—it's critical. If your home stays cooler, pl...
- Light Strategy: The 12-16 hours of daily light is non-negotiable for strong chili plants. If using grow lights, posit...
Frequently asked questions
Got questions about growing fiery chili peppers indoors? You’re not alone! Here are answers to the most common concerns—from sunlight struggles to spicy surprises.
How much sunlight do chili peppers really need indoors?
Chilis thrive with 6–8 hours of direct sunlight daily. Place them near a south-facing window or supplement with a grow light (12–16 hours/day) if natural light is weak. Yellowing leaves? You’re likely not getting enough light—try moving them closer or upgrading your setup!
How long does it take to grow chili peppers indoors?
From seed to harvest, expect 3–6 months, depending on the variety. Fast growers like Thai chilies may fruit in 8–12 weeks, while jalapeños or habaneros can take 4–5 months. Patience pays off—harvest when peppers firm up and turn their mature color!
Why aren’t my chili peppers fruiting indoors?
No peppers? Check these fixes:
- Light: Increase sunlight/grow light exposure.
- Heat: Keep temps between 70–85°F (chilis need warmth!).
- Fertilizer: Use a balanced, low-nitrogen feed (like 5-10-10) every 2–4 weeks.
- Pollination: Gently shake plants or use a small brush to mimic bees.
Can I grow chili peppers indoors without a garden?
Containers, hydroponics, or even kitchen counters
work—just ensure proper drainage and airflow. Opt for compact varieties like Shishito or Cherry Bomb for small spaces. Just avoid overcrowding; give each plant 12+ inches of space to prevent disease.
What’s eating my indoor chili plants?
Common pests include aphids, spider mites, or fungus gnats. Combat them with:
- Neem oil spray (for soft-bodied bugs).
- Sticky traps (for gnats).
- Increase humidity (mites hate it!).
Wrapping up and next steps
Growing chili peppers indoors is a rewarding journey that brings bold flavors and vibrant greenery right to your kitchen! With the right setup—like bright grow lights, well-draining pots, and consistent care—you’ll enjoy fresh, fiery peppers year-round.
Whether you’re a spice enthusiast or a beginner gardener, every tiny seedling is a step toward homegrown heat.
Ready to take the next step? Start with just one plant—experiment with varieties, tweak your setup, and watch your confidence (and pepper count!) grow. 🌱 Happy growing!